Cloudshelf Connector for Salesforce B2C Commerce Cloud
The code for this connector is available on GitHub .
Abbreviations
For this document the following abbreviations are in place:
- Salesforce B2C commerce cloud: SFCC
- Open commerce API: OCAPI
- StoreFront Reference Architecture: SFRA
- Business Manager: BM
Useful links
Summary
This document provides general overview and technical instruction of installing of Salesforce Commerce Cloud (SFCC) LINK cartridge that lets you integrate Cloudhshelf with SFCC.
Overview
Cloudshelf cartridge (int_cloudshelf) for Salesforce B2C Commerce Cloud.
Cartridge allows to connect SFCC instance with Cloudshelf and includes the next functionalities:
- Export products and catalogs from SFCC to Cloudshelf
- Export stores from SFCC to Cloudshelf
- Order management (aka transfer of basket from Cloudshelf to SFCC)
- Update order status on Cloudshelf API
The cartridge can be used by any new or existing SFCC retailer to be able to connect to Cloudshelf after simply installing the cartridge.
Compatibility
Cartridge is compatible with 6.3.0 and 7.0.0 SFRA version and Salesforce Commerce Cloud API version 24.1 (Compatibility Mode: 22.7)
Also required:
Implementation Guide
Prerequisites
#
Before installing cartridge on SFCC side make sure you have:
- Account and API key created on Cloudshelf side - Getting Started
- SFCC instance with setup site and product catalog
- SFCC business user account
Installing cartridge
#
Complete the following steps to install the cartridge.
Initial Install
#
Clone repository to your computer.
Upload int_cloudshelf cartridge to your SFCC instance.
See the SFCC documentation for adding a cartridge to your storefront:
Cartridge does not contain any additional npm dependencies or client js script changes and can be simply uploaded to SFCC instance after receiving a copy of it.
Registering the Cartridge with Individual SFCC Sites
#
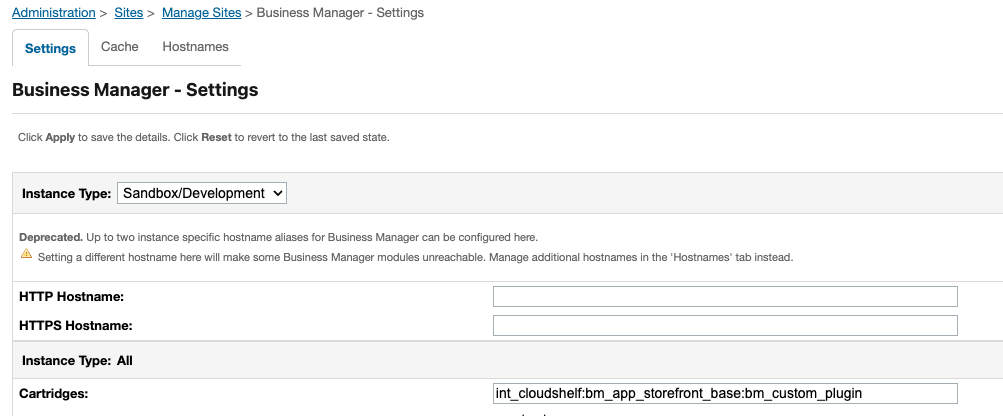
- Navigate to BM > Administration > Sites > Manage Sites > [SiteName] > Settings tab.
- Add ":int_cloudshelf" to the effective cartridge path.
- Click "Apply".

Registering the Cartridge Globally
#
- Navigate to Administration > Sites > Manage Sites
- Click on Manage the Business Manager site link
- Add ":int_cloudshelf"" to the effective cartridge path.
- Click "Apply".

Importing Metadata, Services and Jobs
#
Complete the following steps to import the Cloudshelf metadata, jobs and services.
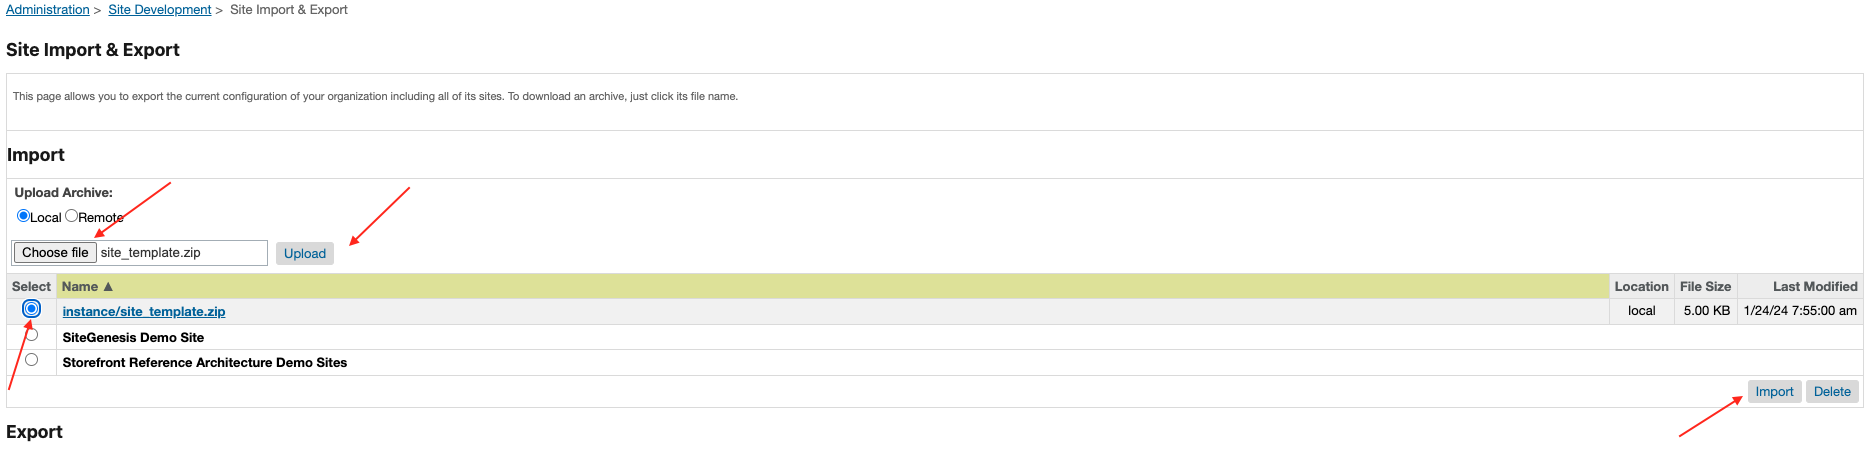
- Navigate to BM > Administration > Site Development > Site Import & Export
- In the Upload Archive section
- Archive data/site_template folder from the repository and use it for upload
- Select Upload.
- On page reload select the site_template radio button
- Press Import Button
Depending on the SFCC environment you use, optionally it is possible to import separately metadata services and jobs.
- Metadata files (files in data/site_template/meta folder) can be imported in BM > Administration > Site Development > Import & Export (first upload xml files then import Meta Data).
- data/site_template/jobs.xml file can be uploaded and imported in BM > Administration > Operations > Import & Export (first upload xml files then import Jobs).
- data/site_template/services.xml file can be uploaded and imported in BM > Administration > Operations > Import & Export (first upload xml files then import Services).
Setup
#
Configuring custom Site Preferences for Cloudshelf API key value is required. All other settings are optional.
Configuring Custom Site Preferences for API key
#
Complete the following steps.
- Navigate to Site > (select desired SFCC Site) > Site Preferences > Custom Preferences > Cloudshelf
- Select the appropriate Instance (Sandbox/Development, Staging, Production), and click Apply.
- Set the following using the value provided by your Cloudshelf representative: Cloudshelf API Key
- Click Apply.
Custom Site Preferences Configurations
#
Other setting available in Navigate to Site > (select desired SFCC Site) > Site Preferences > Custom Preferences > Cloudshelf

Jobs & Schedule
#
In BM go to Administration > Operations > Jobs.
Two jobs are part of the initial cartridge setup
- CloudshelfDataExportFull -- Full export of SFCC products and categories to cloudshelf. Also, exports SFCC stores marked with isCloudshelf flag to Cloudshelf system as locations
- CloudshelfDataExportDelta -- Delta export of products data to Cloudshelf
For initial full products export simply click "Run" button of CloudshelfDataExportFull job. It will exports all sites products and categories to cloudshelf and create default theme and cloudshelf entities in cloudshelf system.
To export stores from SFCC to Cloudshelf as location go to BM > Merchant Tools > Online Marketing > Stores > [select store] > CLOUDSHELF Tab, set isCloudShelf to be "Yes" and click "Save"
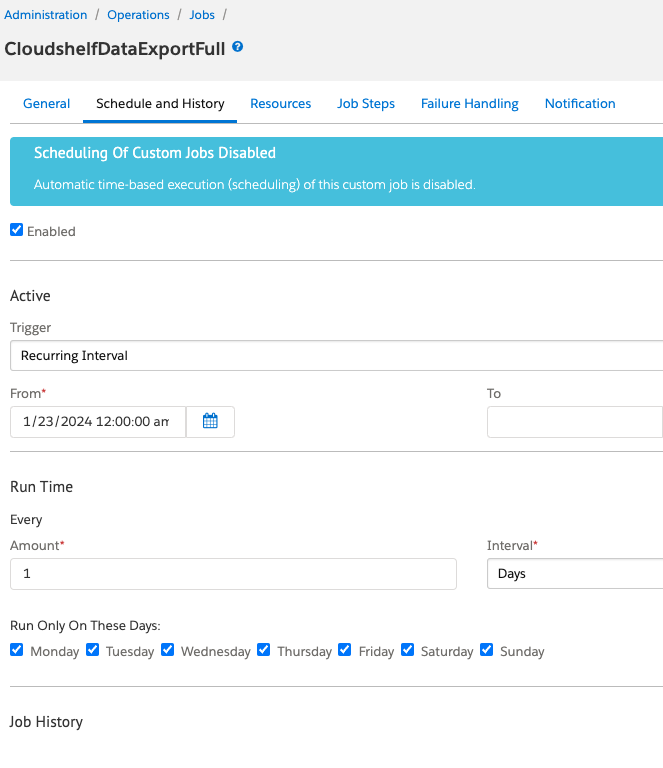
To change jobs configs in BM go to Administration > Operations > Jobs > select a specific job
- In Schedule and History tab you can configure triggering interval for the job
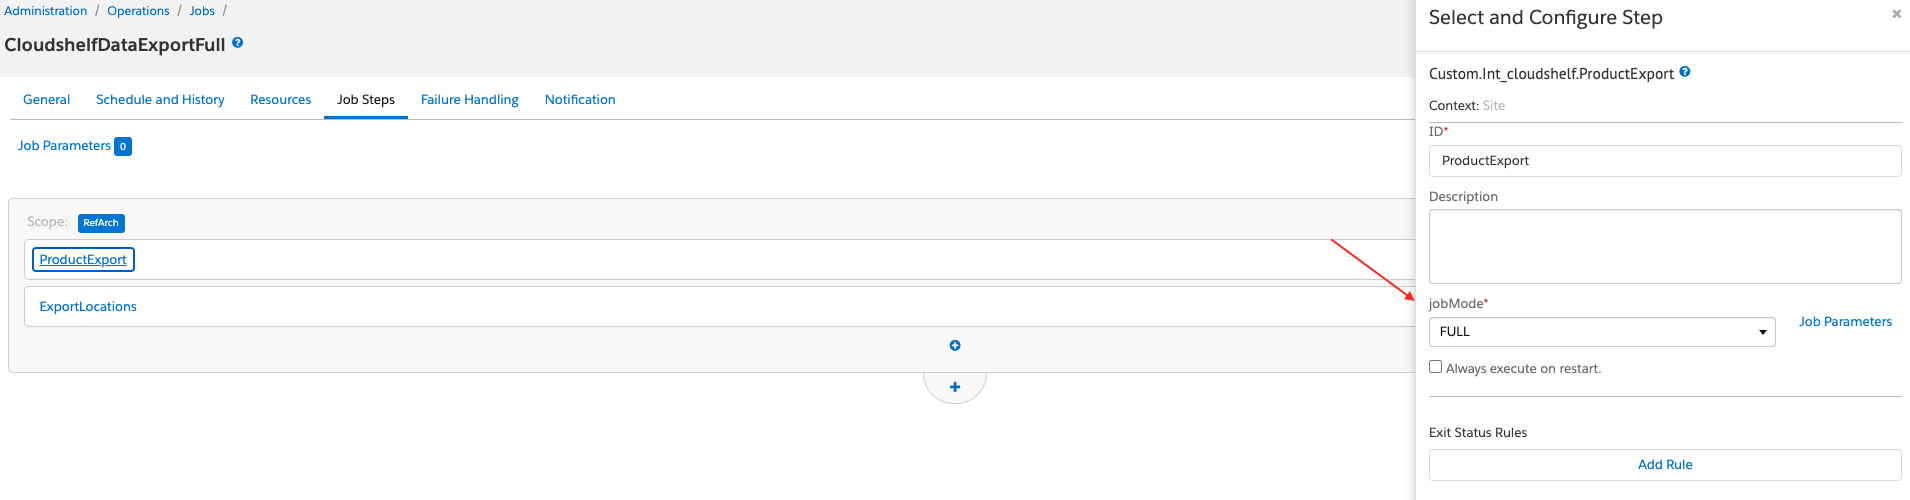
- In Job Steps tab you can select specific sites for which export should work
- In Job Steps tab by selecting ProductExport step you can configure export mode (FULL or Delta)

Order management
#
Transferring basket from Cloudshelf to SFCC functionality works using OCAPI as result the next are required: creating OCAPI client id and setting up OCAPI configs in business manager.
More details about Shop OCAPI can be found by link - Shop API
General OCAPI documentation link - Get Started With OCAPI
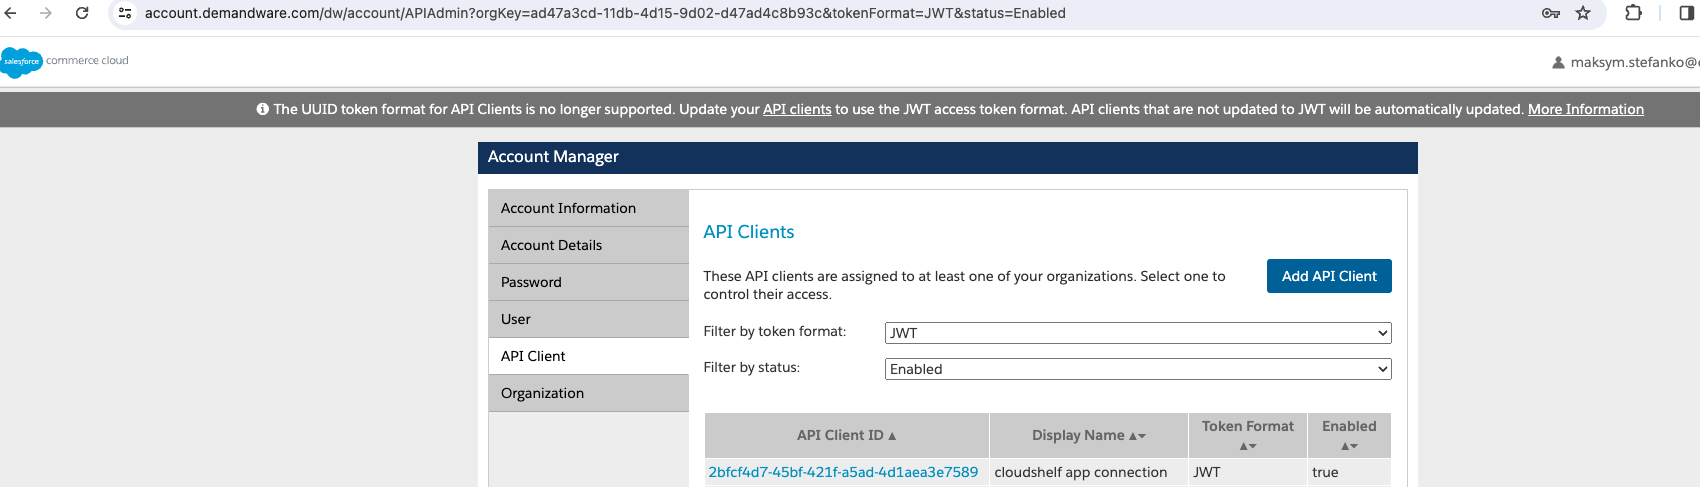
OCAPI client and appropriate client id can be created in SFCC account manager by account manager administrator.
OCAPI client permission and allowed origins for specific SFCC organization or site can be setup in the SFCC business manager using OCAPI setting .
In BM go to Administration > Site Development > Open Commerce API Settings > select required site context

Example of OCAPI config: